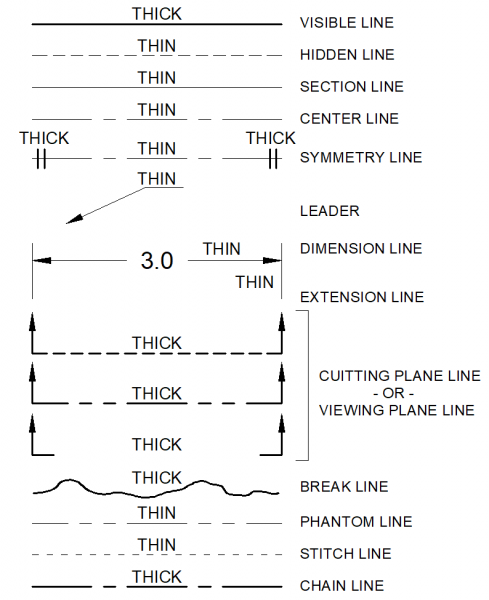
In engineering drawings, lines of different types and widths are used to convey important information about the object being depicted. ASME Y14.2 provides guidelines for the types of lines that should be used in different situations, as well as the appropriate line widths.
In addition to line type, line width is also an important factor in conveying information on an engineering drawing. ASME Y14.2M-1992 provides guidelines for minimum line widths based on the scale of the drawing. For example, on a drawing with a scale of 1:10 or larger, the minimum width for solid lines is 0.6 mm, while the minimum width for hidden lines is 0.3 mm.

A printable PDF of this chart is provided here for convenience.
